Goods and Services Tax (GST) has revolutionized the Indian taxation system by unifying multiple indirect taxes into one comprehensive tax structure. If you’re a business owner or entrepreneur operating in India, registering for GST is essential once your turnover crosses the prescribed threshold. GST registration not only ensures compliance with the law but also enables you to claim input tax credit and expand your business seamlessly across states.
In this guide, we will walk you through the step-by-step process to register for GST in India, the documents you need, and important points to remember.
What is GST Registration?
GST registration is the process by which a business obtains a GST Identification Number (GSTIN) from the government. This unique 15-digit number identifies the taxpayer under the GST regime and is mandatory for businesses whose turnover exceeds the threshold limit or fall under specific categories.
Who Should Register for GST?
You must register for GST if:
- Your aggregate turnover exceeds ₹40 lakh (₹20 lakh for special category states) in a financial year.
- You are engaged in inter-state supply of goods or services.
- You are an e-commerce operator or aggregator.
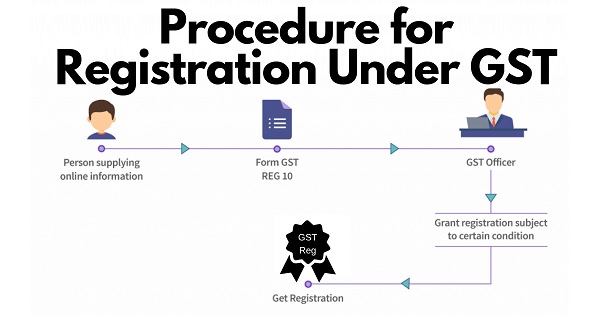
- You supply online information and database access services to unregistered persons.
- You are a casual taxable person or a non-resident taxable person.
- You are required to pay tax under the reverse charge mechanism.
- You make supplementary supplies like goods after the completion of a contract.
Even if your turnover is below the threshold, you may opt for voluntary GST registration to avail input tax credit and build business credibility.
Documents Required for GST Registration
Before you begin the registration process, keep the following documents ready:
| Document | Description |
| PAN card of the business or proprietor | Proof of identity of the applicant |
| Aadhaar card | For individual applicants |
| Proof of business registration or incorporation certificate | Partnership deed, registration certificate, etc. |
| Address proof of the business premises | Electricity bill, rent agreement, property tax receipt |
| Photograph of the applicant | Recent passport-sized photograph |
| Bank account details | Cancelled cheque, bank statement, or passbook |
| Authorization form or power of attorney | If someone else is applying on your behalf |
| Digital signature certificate (DSC) | Mandatory for companies and LLPs |
| Letter of Authorization | For authorized signatory |
Step-by-Step Guide to Register for GST in India
You can register for GST online via the official GST portal: https://www.gst.gov.in. The entire process is paperless and usually takes 3 to 7 working days after submission.
Step 1: Visit the GST Portal and Click ‘Register Now’
- Go to the GST portal homepage.
- Click on ‘Register Now’ under the ‘Taxpayers (Normal)’ section.
- Select ‘New Registration’.
Step 2: Fill in the Part A of the GST Registration Form
You will need to provide:
- Your PAN number.
- Your mobile number (for OTP verification).
- Your email ID (for OTP verification).
- State and district where your business is located.
Submit these details and verify the OTP sent to your mobile and email.
Step 3: Receive Temporary Reference Number (TRN)
Once the OTPs are verified, you will receive a Temporary Reference Number (TRN) on your registered mobile and email.
Step 4: Fill Part B of the GST Registration Application
- Go back to the GST portal homepage.
- Select ‘New Registration’ and then choose the ‘Temporary Reference Number (TRN)’ option.
- Enter the TRN and complete the CAPTCHA.
- Click on ‘Proceed’ to access the application form.
Step 5: Complete the GST Registration Application Form
This part has several sections:
- Business Details: Nature of business, constitution of business, date of commencement, etc.
- Promoter/Partners Details: Name, address, PAN, and photographs.
- Authorized Signatory Details: Person authorized to sign GST returns.
- Principal Place of Business: Complete address proof.
- Additional Places of Business (if any).
- Goods and Services Details: Description of the goods or services supplied.
- Bank Account Details: Cancelled cheque or bank statement upload.
- Verification: Declaration and digital signature of authorized signatory.
Make sure to upload the required documents in the specified formats and sizes.
Step 6: Submit the Application
After filling all the details and uploading the documents, submit the form using a digital signature certificate (DSC) or E-Sign (for individuals with Aadhaar).
Step 7: Application Processing and ARN Generation
Once submitted, the GST officer will review your application. You will receive an Application Reference Number (ARN) via SMS and email for tracking your application status.
Step 8: Verification by GST Officer
The GST officer may contact you for additional information or clarifications within 7 working days. You must respond promptly to avoid rejection.
Step 9: Receive GSTIN and GST Registration Certificate
If everything is in order, your application will be approved, and you will receive your GSTIN and a GST registration certificate on your registered email.
How to Check the Status of Your GST Registration Application?
- Visit the GST portal.
- Click on ‘Track Application Status’ under ‘Services’.
- Enter your ARN or TRN.
- View the current status of your application.
Important Tips and FAQs
What if my GST Registration Application is Rejected?
You will be informed about the reasons for rejection. You can correct the errors and reapply within the stipulated time.
Can I Amend My GST Registration Details Later?
Yes, you can update or amend your registration details through the portal, such as change in address, business nature, or authorized signatory.
What is the Validity of GST Registration?
GST registration is valid as long as the business operates. Cancellation is required if the business is closed or no longer liable to pay GST.
Benefits of GST Registration
- Legal recognition for your business.
- Ability to collect GST on supplies.
- Claim input tax credit on purchases.
- Smooth interstate trade without multiple taxes.
- Access to various government schemes and subsidies.
Conclusion
Registering for GST is a crucial step for any business in India to ensure tax compliance and grow efficiently in the unified market. The process, although detailed, is straightforward if you follow the steps carefully and keep your documents ready.
By registering timely, you avoid penalties and enjoy the benefits of seamless tax credit and interstate trade. So, take advantage of this guide and get your GST registration done without hassle!